Hey there, fellow home cook! Margaret here. You know that sticky, grimy film that creeps up on your kitchen cabinets after a busy week of stir-fries and roasts? It’s like grease ghosts haunting your perfectly good cabinets. As a chef who’s worked in professional kitchens and helped countless families transform their home cooking spaces, I’ve seen this problem a thousand times. The good news? You don’t need expensive cleaners or fancy tools. One humble, pantry-staple ingredient does almost all the heavy lifting: baking soda.
Baking soda isn’t just for antacids or cake—it’s a powerhouse cleaner I’ve relied on for over a decade. It’s non-toxic, budget-friendly, and incredibly effective at cutting through grease without damaging surfaces. In this deep dive, I’ll walk you through every step, share pro tips I’ve learned from years of hands-on experience, and give you a foolproof method to make your cabinets shine again. Whether you’re a beginner or a seasoned home cook, this guide will save you time, money, and frustration.
Buy Now Amazon Top Selling Baking Soda:
1.ARM & HAMMER Baking Soda Made in USA, Ideal for Baking, Pure & Natural, 2.7lb Bag
2.Clabber Girl Baking Soda, 12 Ounce
3.Bob’s Red Mill Baking Soda, 16oz (Pack of 4) – Non GMO, Vegan, Paleo Friendly, Kosher
Why Grease Loves Your Cabinets (And Why Baking Soda Beats It)
Before we dive into cleaning, let’s talk about why kitchen cabinets get so greasy. When you cook, tiny particles of oil vaporize and float in the air. They settle everywhere—especially on flat surfaces like cabinet doors and drawers. Over time, this builds up into a stubborn, sticky film that’s hard to scrub off.
Why baking soda works so well:
- Mild Abrasiveness: Baking soda is a gentle scrubber. It lifts grease without scratching laminate, paint, or wood finishes. (Unlike harsh scouring powders!)
- Alkaline Power: It neutralizes acidic grease and oil residues through a simple chemical reaction, turning them into soluble compounds you can wipe away. (Source: EPA on Safer Choice cleaners)
- Odour Absorption: It’s a natural deodorizer, tackling those lingering cooking smells trapped in the grease.
Think of it as your kitchen’s gentle but effective bouncer—kicking grease out without breaking a sweat (or your cabinet surfaces!).
What You’ll Need (Keep It Simple!)
You probably already have these items in your kitchen. Here’s your minimal supply list:
- Baking Soda: Plain, ARM & HAMMER or any generic brand works perfectly. This is your star player.
- Warm Water: Hot enough to open pores in the wood/laminate but not scalding.
- A Soft Cloth or Sponge: Microfiber is ideal—it traps grease without scratching. (Learn more about microfiber benefits here)
- A Small Bowl: For mixing your paste.
- Optional but Helpful:
- White Vinegar or Lemon Juice: For tough, set-in stains or to boost shine after the main clean.
- A Soft-Bristled Brush: For getting into corner crevices.
- Paper Towels: For quick drying and polishing.
That’s it—no expensive sprays or complicated tools required!
The Step-by-Step Method: Your Complete How to Remove Grease from Kitchen Cabinets with Baking Soda Plan
Now that you have your supplies, let’s break down how to remove grease from kitchen cabinets with baking soda. Follow these steps carefully for the best results. Remember, patience and a gentle touch are key!
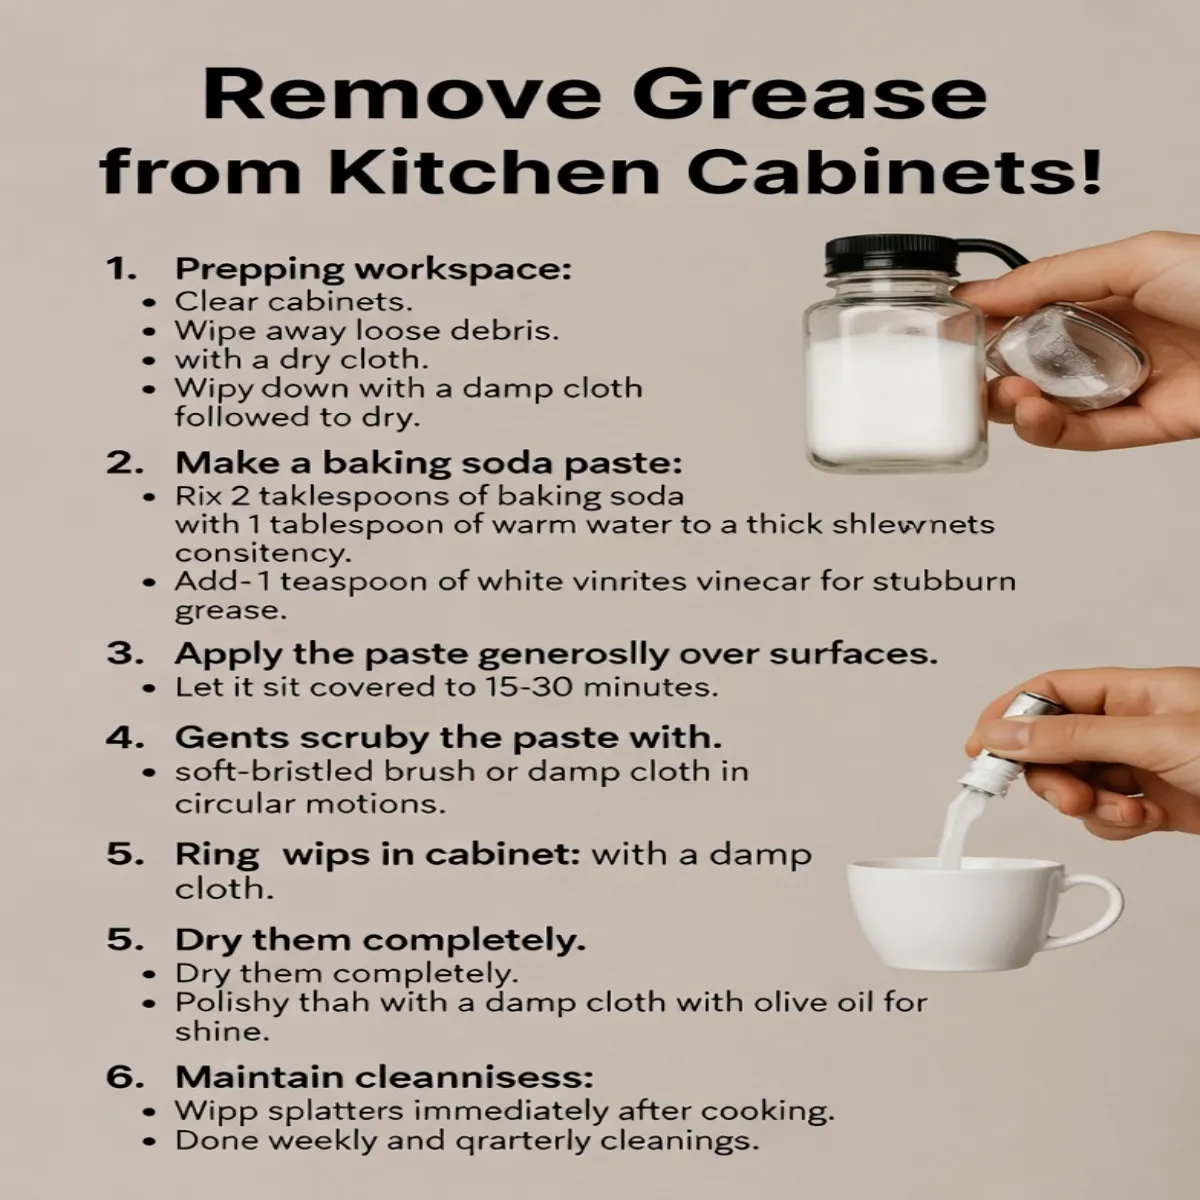
Step 1: Prep Your Workspace (5-10 Minutes)
- Clear the Cabinets: Remove everything inside and on top of the cabinets. Empty drawers and take down anything hanging on handles.
- Wipe Away Loose Debris: Use a dry cloth or paper towel to dust off any loose crumbs, splatters, or obvious grime. This prevents them from grinding into the surface during scrubbing.
- Wipe Down with Damp Cloth: Lightly dampen a cloth with warm water (no soap yet!) and wipe the entire cabinet surface. This loosens up the grease and prepares it for the baking soda treatment. Dry the surface with a clean cloth—don’t leave it soaking.
Step 2: Make Your Baking Soda Paste (The Cleaning Powerhouse)
This is where the magic happens. The paste is gentle enough for any surface but tough on grease.
- In a small bowl, mix 2 tablespoons of baking soda with about 1 tablespoon of warm water. Start with less water—it should be a thick peanut butter-like consistency. Add a drop more water if needed, but avoid a runny paste.
- Optional Boost: For especially stubborn grease, you can add 1 teaspoon of white vinegar to the dry baking soda before adding water. It will fizz—this is the chemical reaction kicking in! Then add the water to form the paste.
Step 3: Apply the Paste & Let It Work Its Magic (15-30 Minutes)
- Using a clean, damp (not wet) soft sponge or cloth, generously spread the paste over the entire cabinet surface you want to clean. Focus extra thickly on greasy spots, corners, and around handles.
- Don’t skimp! A thick, even coating ensures the baking soda can fully react with the grease.
- Let it sit: Cover the cabinets loosely with a clean kitchen towel or plastic wrap (to keep dust off) and let the paste sit for at least 15 minutes. For really tough grease, 30 minutes to even an hour is ideal. The longer it sits, the more effective it becomes. You’ll see the paste start to clump up or change color as it absorbs the grease—that’s a good sign!
Step 4: Gently Scrub the Grease Away (5-10 Minutes)
Now comes the satisfying part!
- Take off the towel/cover.
- Using a soft-bristled brush (an old toothbrush works great) or just your damp sponge/cloth, gently scrub the entire surface in circular motions. Focus your effort on the greasiest areas. You should feel the paste working and see the grease lift away.
- Be gentle! Apply light pressure. Baking soda is abrasive enough for grease but gentle enough not to scratch laminate, paint, or sealed wood. Avoid metal scouring pads—they can ruin your finish.
Step 5: Rinse, Wipe, & Polish to Perfection (5 Minutes)
- Rinse: Wipe the entire surface thoroughly with a damp, soft cloth soaked in warm water. You’re removing all the loosened grease and used paste. Make sure no residue remains.
- Dry: Dry the cabinets completely with a clean, dry microfiber cloth. This prevents water spots and streaks.
- Polish (Optional but Recommended): For an extra shine, dampen a new clean cloth very slightly with a few drops of olive oil or vegetable oil. Wipe the entire cabinet surface in the direction of the grain (if wood) or just in smooth motions (for laminate/paint). This adds a beautiful, protective sheen. Wipe off any excess oil with a dry cloth immediately.
Step 6: Maintain Your Sparkling Cabinets (Ongoing)
Congratulations! Your cabinets should look remarkably cleaner and smell fresh. To keep that shine:
- Wipe Immediately: After cooking, wipe splatters off cabinet surfaces right away with a damp cloth—don’t let grease sit.
- Weekly Quick Clean: Once a week, do a quick wipe-down with a damp cloth and a tiny pinch of baking soda in the water to prevent buildup.
- Deep Clean Quarterly: Repeat the full paste method every 3 months, or more often in heavy-use kitchens.
Tackling Special Situations: Beyond the Basic Method
Scenario 1: Really Stubborn, Set-In Grease Stains
Sometimes grease has baked on for months. Don’t panic!
- Apply a thicker paste: Use 3 parts baking soda to 1 part water.
- Let it sit longer: Cover and leave it overnight (8-12 hours). The prolonged exposure breaks down the old, hardened grease.
- Scrub vigorously (but gently!): Use your brush with a bit more elbow grease (still light pressure!). Rinse and polish as usual.
Scenario 2: Painted or Laminated Cabinets
Baking soda is safe for almost all finishes, but here’s how to be extra cautious:
- Test First: Mix a tiny bit of paste and apply it to an out-of-the-way corner. Let it sit for 10 minutes, scrub gently, rinse, and dry. Check for any discoloration after 24 hours. If good, proceed!
- Stick to Light Pressure: Always use light, circular scrubbing motions. Avoid excessive force.
Scenario 3: Wood Cabinets (Unpainted, Natural Finish)
You’re in luck! Baking soda is fantastic for wood.
- Avoid Over-Wetting: Don’t soak the wood. Your damp wiping cloth should be just moist.
- Condition After: Wood can absorb moisture. After your deep clean and polish, consider applying a small amount of wood conditioner or polish designed for your specific wood type (e.g., oak, maple) once a month to keep it happy.
Scenario 4: Grease Buildup Inside Cabinet Drawers & Shelves
Grease loves to hide in dark corners!
- Focus on Corners: Use your brush or an old toothbrush to really get into the nooks and crannies.
- Use a Spray Bottle (Optional): Mix a solution of 1 tablespoon baking soda in 1 quart of warm water. Lightly spray the inside of drawers/shelves, let sit 10 minutes, then scrub with your sponge/cloth and rinse.
Scenario 5: Preventing Grease from Spreading in the First Place
Why wait for grease to build up? Proactive steps save time and effort:
- Use a Splatter Screen: Whenever frying or sautéing vigorously, use a mesh splatter screen over your pan. It catches most flying oil.
- Cover Pots: When simmering sauces or stocks, keep lids on as much as possible.
- Clean Spills Immediately: Wipe up any oil splatters on countertops right after cooking with a damp cloth and a pinch of baking soda in the water.
- Maintain Your Range Hood: A well-functioning range hood filters out most grease before it reaches your cabinets. Clean its filters monthly! (Check USDA guidelines on home food safety for more tips)
Common Mistakes to Avoid (Learn from My Kitchen Wars!)
Even experienced cooks trip up sometimes. Here’s what not to do:
- Mistake #1: Using Too Much Water in the Paste. A runny paste won’t cling to the surface and won’t be effective. Keep it thick!
- Mistake #2: Scrubbing Too Hard or Using Steel Wool. This can scratch laminate, paint, or even light wood finishes, creating tiny pockets where more grease will collect. Gentle circular motions are key.
- Mistake #3: Skipping the Rinse. Leaving the used paste on can dry and become a gray film itself! Rinse thoroughly.
- Mistake #4: Not Letting It Sit. Rushing the process means the baking soda hasn’t had time to react fully with the grease. Patience pays off!
- Mistake #5: Using Harsh Chemicals. Bleach, ammonia, or strong oven cleaners can damage finishes and release nasty fumes. Baking soda is safer for your family, pets, and the planet.
Final Verdict: Your Grease-Free Kitchen Awaits!
Learning how to remove grease from kitchen cabinets with baking soda isn’t just a cleaning hack—it’s a game-changer for a healthier, happier kitchen. It’s affordable, safe, effective, and incredibly simple. You’ll save money, avoid harsh chemicals, and give your cabinets a deep, sparkling clean that lasts.
Remember the key principles: thick paste, proper sitting time, gentle scrubbing, and thorough rinsing. Don’t be intimidated by stubborn grease; with this method, you have the upper hand. Your kitchen deserves to shine, and you’ve got the perfect tool right in your pantry.
Give it a try on your next cleaning day. I’d love to hear how it goes in the comments below—share your before and after photos! Now go whip up that paste and get those cabinets gleaming. Your future self (and your guests) will thank you.
People Also Ask-
1. Can I use baking soda on stainless steel appliances nearby?
Yes! Baking soda is safe for stainless steel. Apply the paste only to the cabinets, then wipe the appliance clean afterward. Avoid letting the paste sit on stainless for extended periods to prevent potential etching.
2. Will baking soda remove grease from my wooden cutting board?
Absolutely. Make a thick paste, scrub gently, rinse well, and thoroughly dry the board. Baking soda won’t harm properly sealed cutting boards. Wipe it clean immediately after use.
3. Is this method safe for cabinets with a matte paint finish?
Yes, when applied and scrubbed gently as described. Always do a hidden spot test first if you’re unsure. Light pressure is essential to preserve the matte finish.
4. How often should I deep clean my kitchen cabinets?
For most homes, deep cleaning every 3 months works well. In busy kitchens with frequent frying, aim for every 2 months. Regular quick wipes keep grease at bay between deep cleans.
5. Can I make a spray version instead of a paste?
Yes! Mix 1 tablespoon baking soda in a quart of warm water and spray lightly. Let sit 10 minutes, then wipe clean with a damp cloth. This works well for quick maintenance between deep paste cleanings.
Pingback: How Much to Paint Kitchen Cabinets in 2026: Expert Tips for a Fresh, Affordable Kitchen - KitchenFlavors
Pingback: Best Waterproof Flooring for Kitchen: The Most Hygienic, Easy-to-Clean Picks I’ve Personally Tested for Busy Home Cooks - KitchenFlavors